Thursday, 30 August 2012

RECIPE | COFFEE AND WALNUT LOAF


A classic cake turned into a LOAF. Oh how I love to make loaves.

They are kind to me because:
(a) They ALWAYS work and...
(b) It feels less naughty eating a loaf than a cake!


COFFEE AND WALNUT LOAF

Ingredients:

Cake:
90g Walnut Halves/Pieces
125g Butter
210g Caster Sugar
2tbsp Milk
1tsp Vanilla Essence
3tsp Instant Coffee
2tsp Cinnamon
300g Self-Raising Flour
2 Eggs

Icing:
2tsp Instant Coffee
2tbs Boiled Water
80g Icing Sugar


Instructions:

1.  Preheat your oven to 160°C and grease and line a 2lb loaf tin.

2.  Put the walnuts onto a baking tray and place them in the oven for 10 minutes. Give them a good shake after 5 minutes to make sure that all are nice and toasted. Once removed from the oven, split the walnuts into two halves and set aside.

3.  In a saucepan, place the butter, sugar, milk and instant coffee and simmer on a low heat, stirring until the butter has completely melted and you have a smooth mixture.

4.  Sieve the flour and cinnamon into a mixing bowl and in the middle make a well.

5.  Add the butter/coffee/sugar/milk mixture to the flour.Whisk the eggs with the vanilla essence and add them to the mixture, followed by half of the chopped walnuts. Stir the mixture until it is evenly combined.

6.  Pour (or slop!) the mixture into the loaf tin and then sprinkle the remaining half of the walnuts on top. Place the tin in the oven for 40-45 minutes (depending on your oven).

7.  Once removed, leave the cake in the tin to cool.

8.  Once it is cool enough to remove, take the cake out of the tin and place onto a wire cooling rack.

9.  To make the icing: Combine the hot water and coffee in a mug and then gradually add it to the icing sugar, stirring until it forms a nice gloopy consistency. Drizzle the icing over the top of the cake.



Tuesday, 28 August 2012

I'M STILL ALIVE. JUST ABOUT...


 Highlights of my 
M  U  N  D  A  N  E 
life as of late...


# 1  I bought a JULIENNE PEELER!

Off eBay. £1 (Okay...£1.70 with p&p if you want to get specific).
Inspiration came from THIS post over at Oh She Glow's (a lovely vegan blog).
You can make veggie spaghetti, noodles, etc...the possibilities are endless!

(Photo: Ohsheglows)


# 2  I made yet ANOTHER courgette cake.

A mixture of the first and second cakes I previously posted as this was a lime and coconut loaf.
No frosting though but we shall not divulge into that right now...
*Note to self: Fat-free cream cheese does NOT make good frosting.


# 3  I have now pretty much COMPLETED RESEARCH FOR MY DISSERTATION.

And this is probably COMPLETELY pointless as I still havn't really thought of a solid title, been assigned a tutor or even been contacted about my department regarding anything dissertation-related. Nice one. Ah well.
Oh, and I also made labels for my dissertation/module folders for this term...


# 4  I've been making DIY POLAROIDS!

Using my snazzy new Kodak Printer, some freebie photo paper and this swanky little free programme called Poladroid which you can download HERE.


# 5  ...and I've entered a whole new level with my love for ORGANISING.


I had a little clean up and sorted out my main diary (which in case you wanted to know is THIS trusty personal sized chameleon Filofax).


Things-to-do list from A Pair of Pears blog (you can download it HERE) and a very unprofessional homemade calendar courtesty of Microsoft Publisher.


...and last but not least.
Recycling egg boxes into jewellery holders.

Thursday, 16 August 2012

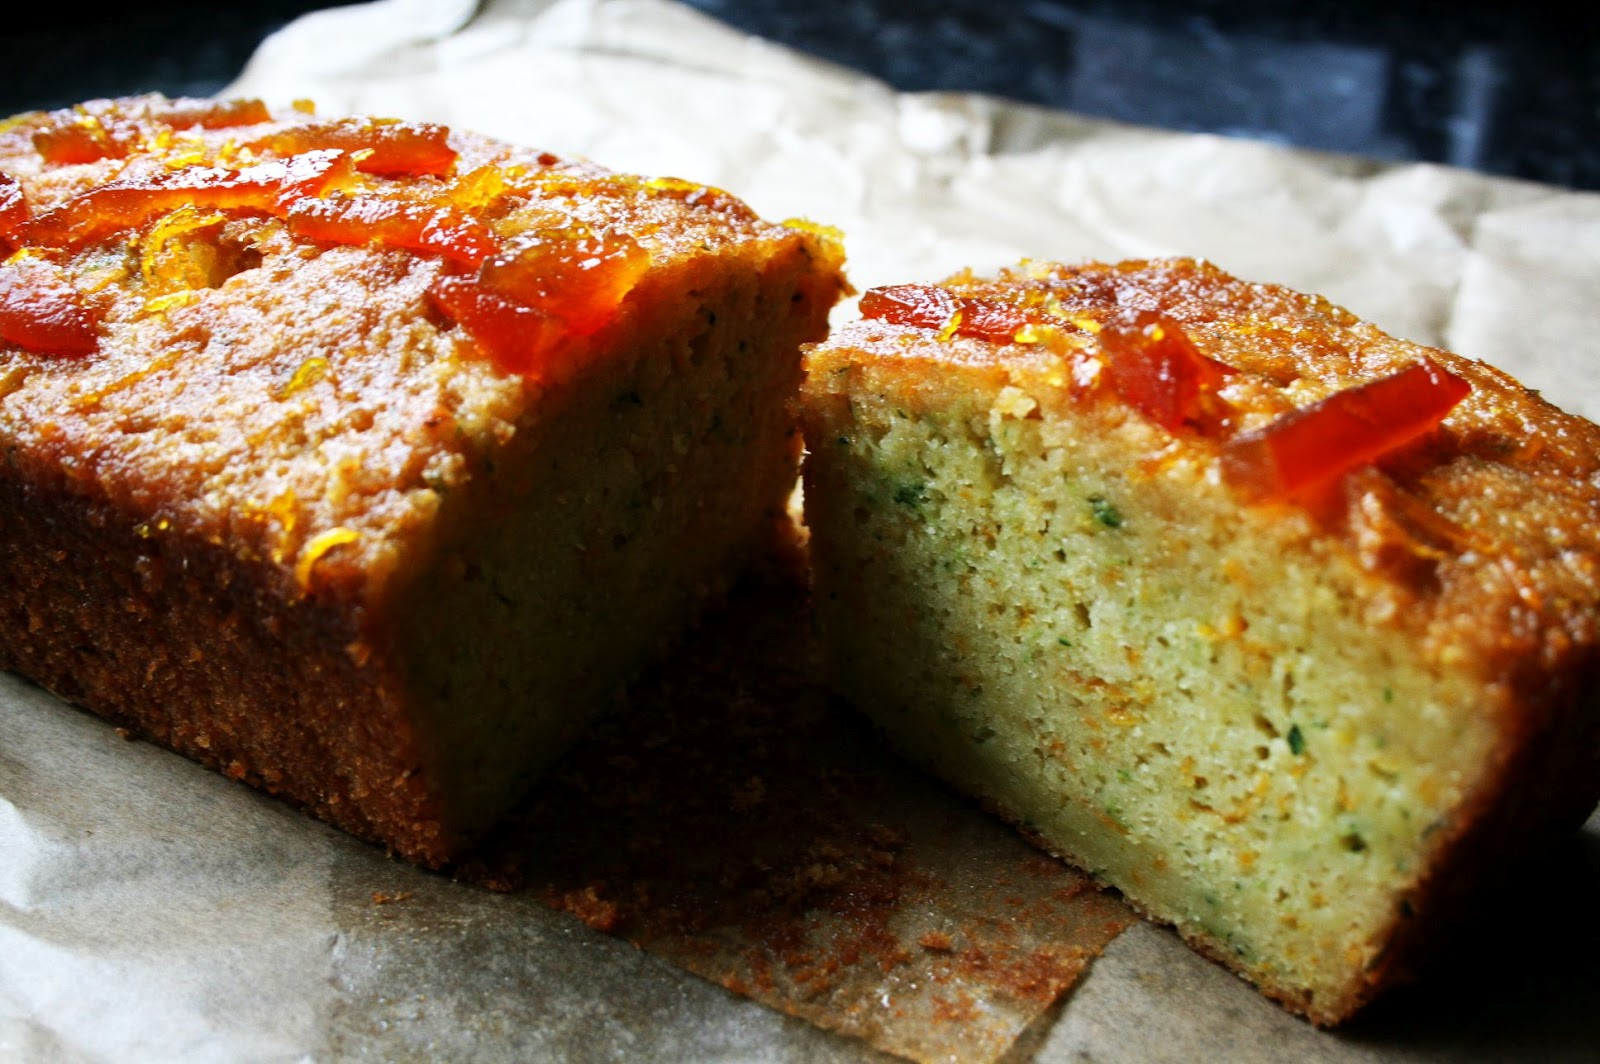
RECIPE | STICKY MARMALADE COURGETTE LOAF


Well hey there, would you look at that...another baking delight incorporating that funny green vegetable.

This one LOOKS and TASTES incredible and is also ridiculously easy to make.


STICKY MARMALADE COURGETTE LOAF

Ingredients:

Cake:
175g Self-Raising Flour
1tsp Baking Powder
150g Brown Sugar
150g Butter
3 Eggs
2tbsp Milk
1tsp Vanilla Essence
200g Grated Courgette
Zest of 2 Oranges

Sticky glaze:
3tbsp of your favourite Marmalade.
40g Caster Sugar.
Juice + Zest of 1 Orange.


Instructions:

1. Preheat your oven to 180°C. Grease and line a 2lb loaf tin.

2. Beat the butter and sugar together until creamy.

3. Add the eggs individually until they are mixed in well.

4. Add the flour and baking powder to the mixture, followed by the grated courgette, orange zest and milk.

5. Pour the mixture into the loaf tin and place on the middle shelf of your oven for 50-55 minutes.

6. To make the syrup: Heat the juice and zest of the orange in a pan and add the marmalade and sugar. Cook on a very low heat until a nice gloopy syrup forms.

7. Whilst the cake is still hot, take a skewer and jab the cake until your heart is content (this makes the cake extra moist as you are making nice little holes for the syrup to delve into).

8. Pour the sticky glaze over the loaf whilst it is still in the tin. Leave until cool and then remove it from the tin.


Even Paddington Bear would be proud.

Wednesday, 15 August 2012

RECIPE | COCONUT, LIME AND COURGETTE CAKE


This is my recipe for a birthday cake I made for my sister last week.
It's a mixture of several recipes I found on the internet and then adapted to make one that suits my families tastes.

Very easy to make...and also very handy for using up the abundance of courgettes we have produced from our allotment this month!


COCONUT, LIME AND COURGETTE CAKE

Ingredients:

Cake:
350g Self-Raising Flour
250g Caster Sugar
250g Butter
1tsp Vanilla Essence
4 Eggs
350g Grated Courgette
60g Dessicated Coconut
Zest + Juice of 1 Lime

Frosting:
200g Cream Cheese
60g Butter
250g Icing Sugar
Generous portion of Dessicated Coconut for sprinkling.


Instructions:

1. Preheat the oven to 180°C. Grease and line two 25cm cake tins.

2. Beat the sugar and butter in a bowl until smooth and creamy.
* A tip from Mama Wood is to use an electric whisk and wait for the mixture to become lighter in colour.

3. Add the eggs individually, beating them into the mixture.

4. Add the flour, vanilla essence, grated courgette, lime zest, lime juice and dessicated coconut.

5. Pour the mixture into the two cake tins and place on the middle shelf of the oven and cook for 30-40 minutes.

6. When the cakes are cooked, remove them from the oven and allow to cool for 20 minutes. Remove the cakes from the tins and allow them to cool for a further hour on wire cooling racks.

7. To make the frosting: Mix the cream cheese, butter and icing sugar together until smooth and fluffy. Spoon the mixture over the top of one of the cakes.
Place the other cake on top (like a sandwich!). Then use the rest of the frosting to cover the whole cake. Once the cake is covered, sprinkle generously with dessicated coconut.


The Result:

A lovely, moist and flavoursome sponge cake with a generous layering of cream cheese frosting.
And trust me, you won't even taste the courgette! 

Friday, 3 August 2012

DIY | TO-DO-LIST BUNTING

Another week has passed me by. I have now been back from Krakow for just over six weeks and my mind has turned into a complete jelly. My memory is terrible and I have nothing...literally NOTHING to keep me busy since my job fell through. BOO.

If my life was a recipe it would look something a little like this...

'Alice's Current Life' (AKA a summer spent in Berkhamsted)

Ingredients:

500g of hermit life.
250g of cabin fever.
300g of getting way too excited over DIY and baking.
100ml of life laundry.
75g of ebay addiction.
250g of dissertation pro-activity taken to the next level.
2 tbsp of “Why am I in The Crown again?”
*Optional garnish of being chatted up by the council guy who cuts the grass on the canal.

So to make myself feel like I do actually have a life... I intend to take on many DIY projects this Summer!
My first project is an easy one. A nice gentle break-in if you will. The idea spurred from my obsession with lists and being organised.
On top of my TWO diaries, I will usually always have at least THREE notebooks going at one time...one in a draw, one in my bag and one by my bedside table.

Combining notes/memos/to-do-lists from all of these can get a little bit confusing so I created this:


To make TO-DO-LIST BUNTING, you will need the following items:

String  /  Scissors  /  Drawing Pins  /  Pegs  /  Paper  /  Pen


#1   Cut the string to your required length and then tie a small loop knot at each end of the string.

#2   Secure the string to the wall with the drawing pins.

#3   Get pegging!


Tuesday, 31 July 2012

COLLECTIVE INSPIRATION


I finally signed for an apartment this weekend. So now I have somewhere to move into in September - Hurrah!

It is HUGE and a completely BLANK CANVAS.

I am really looking forward to having a place I can get creative and make my own and I have been trawling through various interior/DIY/recipe blogs on the internet for inspiration for my new place.
Here is a collection of what is currently getting my creative juices flowing...


INTERIOR INSPIRATION


where the wild things are forts


DIY IDEAS


IMG_7016-small.jpg


RECIPES

EVERYTHING over at Simply Breakfast.

Pepperoni Pizza Zucchini Bake


Saturday, 28 July 2012

RECIPE | WALNUT CINNAMON BUTTER


So we thought we'd jump on the nut butter wagon just to see HOW good home made nut butter actually is.

IT'S PRETTY DAMN GOOD.


WALNUT CINNAMON BUTTER

Ingredients:

200-400g of Walnuts
1/2 a teaspoon of Cinnamon
Sugar / Syrup (or sweetener of your choice)


Instructions:

1.  Place the walnuts into a food processor and process them on full power. This will take you about 10-15 minutes in total depending on how MACHO your food processor is (our's decided to heat/oversmoke after about 8 minutes!).

2.  The nuts should start to become finely ground and bind together. Everything will look like it has gone wrong as the nuts start to clump into a dough-like consistency!

HAVE NO FEAR.

3.  This is where your desired piece of cutlery (we chose a knife) comes in handy and saves the day.
In between every 2-3 minutes of processing you should stop the processor and scrape the nutty/doughy mixture from the sides of the container and then continue to process again.


You will soon start to become bored of nothing happening and think...

WHAT THE HELL HAVE I DONE WRONG?

WAIT.

WAIT IT OUT.

4.  All of a sudden, out of nowhere, the nuts will start to ooze their natural oils and the mixture will form into a smooth paste. At this point add your cinnamon and preferred sweetener. Then continue to process until the nut butter reaches your desired consistency.


...et voila!

VERY simple and easy 100% natural home made nut butter.


Thursday, 26 July 2012

TOP 10 | ESSENTIAL DEN-MAKING MATERIALS

So obviously I have not yet posted about making dens...or dens of any sort for that matter. I apologise.
This is mainly due to the fact that I don't have the most ideal space for making a den in my room at home and also because I am currently lacking important den-worthy materials. However, come mid-September I will have a new student pad up in Leeds and I hope to make it DENTASTIC.

Making dens is all about being creative.
The basic principle is using whatever materials you have available to you to make a little hide away space for your own comfort. You don't need lots of £££ or a shipment from Ikea. That defies the WHOLE point. So to get you started I have compiled a list of the TOP 10 ESSENTIALS needed to make the perfect den.


#1  YOUR IMAGINATION
Be creative.


#2  SPACE
A relatively large space where it doesn't matter if you take it as your own ground for a few hours, days, life-time...! If you want a quiet and relaxing den then it's good to choose a space where you no there will be minimal disturbances and distractions.
However, if you want a PARTY DEN(!) then it's good to place it in the centre of a room, student digs, abandoned squat or whatever takes your fancy.

picc


#3  POLE
Your centre. Your inner chi. Your den's "core".
Therefore, the sturdier the better. Use a tripod, old mop/broom stick, bamboo sticks from the garden, hat stand, light stand, shower/curtain rails, a javelin(!)...okay, maybe not the last option but as you can see the list goes on and on.

Tumblr_m2fodw18re1ql7kv1o1_500_large


#4  CANOPY / MOSQUITO NET
You can pick these up for real cheap off ebay (from China - mine was £1.99!). They also sell them in the kids sections in Ikea and Next.
Again, be imaginative, look in outdoors/camping stores for mosquito nets.


#5  DRAPING MATERIALS
These can be as basic as your spare set of bed sheets (although don't use this an excuse not to wash the ones currently on your bed) or something more extravagant like the hand-made throw some lady made out of 12 Alpaca's which you got on your gap year.
The MORE materials the BETTER.
Drape here...drape there...drape everywhere! This is where #6 comes in handy.


#6  PINS / PEGS / HOOKS / STRING
Drawing pins, safety pins, pegs, sticky hooks or the screw-in kind, string, rope or twine are also good but make sure you secure them properly to avoid any collapses.


#7  INTERIORS
So now you've built your den. It's probably going to be looking a little empty in there.
It's best to think of the essential things you need like desks and a seating/lounging area and then think of these in miniature form.
Good desk materials include: cardboard boxes, milk crates, coffee tables, foot rests, upturned laundry baskets/bins.
Good seating materials include: cushions, pouffe's, bean bags...hell, why not get a hammock if you've got enough room?

Pinned Image


#8  LIGHTING
Standard = Fairy lights. I do love them though. Be careful not leave them on for too long or too close to the fabric as you don't want to snooze off to end up with your local firemen coming to rescue you from your den at 3am...or maybe you do! Lava lamps, glow jars (how cool are these?!) and candles can also add ambience.

glowing jars


#9  HOME COMFORTS
For decor and atmosphere: music, incense, your favourite snuggling materials, bunting, flowers, etc.
 Things to keep you occupied in your den: a good book, writing, your laptop and a movie...or for me this year...the dissertation!

future home


...and last but not least...


#10  DEN SNACKS!
Popcorn, cakes and snacky things are best. Ice cream if you're feeling fancy.
Here's some inspiration for a selection of healthy den-snack recipes:


Wednesday, 25 July 2012

RECIPE | GIN-GIN MULE

This drink will requench your thirsts for days like these when the British sun decides to show its face!
And there's also just the simple fact that drinking/eating pretty much anything (other than jam, obvs) from a jam jar is just INSTANT ADDED COOL.


To make a GIN-GIN MULE you will need:

3oz Gin (AKA double measure)
A drench of lime juice
Lots of crushed ice
As much ginger beer as you like...

* Also lovely with some fresh mint leaves but alas our mint plant has died. R.I.P.


Tuesday, 24 July 2012

REVIEW | JEREMIAH WEED ROOT BREW


Jeremiah Weed are newcomers to the UK brew scene. Currently available are two different brews: Root Brew (brewed with a hint of ginger) and the Sour Mash Brew (brewed with a hint of bourbon).
I saw a review of their brews online and was desperate to get my hands on a bottle. Luckily enough, the local Waitrose was stocking the stuff and we snapped up a bottle of the Root Brew.


Served chilled over ice (how sophisticated) this was a DELICIOUS drink.
I am a BIG fan of the various ginger and root beers available at the moment but this one really tops them all.
It is much less acidic/sweet/artificial tasting than Crabbies Ginger Beer (my previous favourite), with a nice refreshing and natural tang.


 WARNING: This stuff is a little TOO drinkable.